

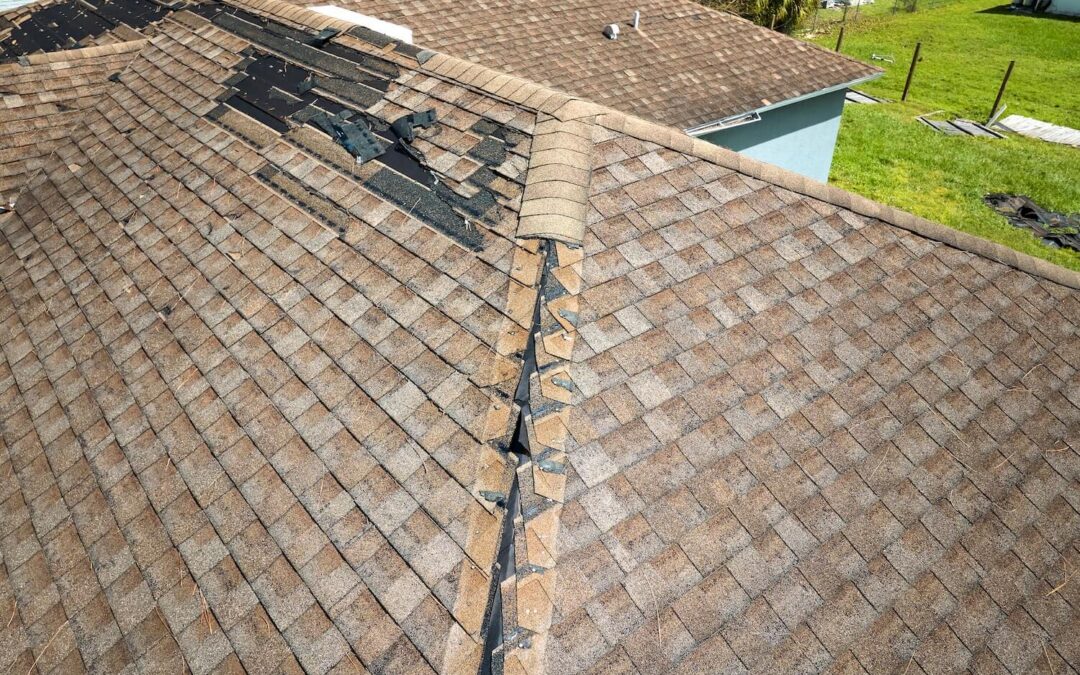
For many residential and commercial property owners across Southern California, discovering a dark stain spreading across the ceiling or watching water drip during a sudden rainstorm triggers an immediate sense of urgency. In that stressful moment, the instinct is to seek the fastest, simplest solution: find the area directly above the indoor stain, slap on a layer of waterproof sealant or replace a single damaged shingle, and declare the job done. It feels like a prudent, cost-effective fix that resolves the crisis without breaking the budget.
However, in building maintenance, few decisions are as deceptively expensive as fixing only the visible symptoms of a leak. A roof is not a single, continuous sheet of plastic; it is a complex, multi-layered water-shedding system composed of surface materials, underlying waterproof membranes, metal flashings, fasteners, wooden decking, structural framing, and integrated drainage pathways. When water breaches the exterior armor, it rarely travels in a straight line from the sky to your living room floor. Treating a ceiling stain as a localized surface problem while ignoring the broader mechanics of the roof system is one of the most widespread repair mistakes property owners make. It frequently conceals deeper structural decay, traps destructive moisture inside building cavities, and sets the stage for recurring, far more costly structural roof repairs.
The Hidden Anatomy of a Roof Leak: Why Water Travels
To understand why quick patches so often fail, you must first understand how water behaves once it penetrates a building’s outer defense. Property owners naturally assume that an indoor ceiling stain marks the exact spot where rainwater is breaking through the roof field. In reality, physics, gravity, and structural framing combine to create an elusive, indirect path for moisture intrusion.
When water enters through a microscopic tear in an underlayment seam, a loosened flashing joint, or a cracked tile miles away from the ceiling stain, it naturally follows the path of least resistance. On a sloped roof, gravity pulls water downward, but surface tension lets it run horizontally along the underside of plywood decking, trace the edge of a diagonal rafter, soak through fiberglass insulation batts, and pool on top of an interior drywall joint before finally leaking into the room below.
Wind-driven rain complicates the diagnostic puzzle even further. High-velocity gusts can push rainwater sideways or uphill beneath tile overlaps and shingle starter courses, introducing moisture into areas that remain completely dry during normal downpours. If a contractor or well-meaning property owner simply applies a surface patch over the area directly above the indoor stain, they are almost certainly sealing the wrong location. The original breach remains wide open, while the new surface patch can actually trap migrating moisture inside the structural wood, accelerating hidden rot and mold growth.
Mistake #1: Roof Patching Above the Stain Instead of Finding the True Entry Point
The single most common and costly mistake in roof repair is treating the indoor symptom rather than performing a root-cause analysis. When a repair crew or property owner patches the roof surface directly above a ceiling mark without tracing the full water path, two separate problems occur simultaneously:
- The Original Leak Remains Unchecked: Rainwater continues to breach the unaddressed opening during every subsequent storm, soaking structural timbers, saturating ceiling insulation, and spreading further through wall cavities.
- A New Point of Vulnerability Is Created: Attempting to install an unnecessary surface patch often involves walking across fragile tiles, tearing brittle shingle tabs, or disturbing surrounding flashings. This unnecessary disturbance frequently breaks existing seal strips or cracks surrounding materials, creating a brand-new leak point right next to the original issue.
A recurring leak that manifests in a slightly different location a few months after a patch is rarely “bad luck”. More often than not, it is the direct result of a superficial fix that failed to trace the water path back to its true origin at a pipe boot, roof valley, or wall transition.
Mistake #2: Over-Relying on Roofing Cement and Quick-Fix Roof Sealants
In a rush to stop active water flow, property owners and inexperienced repair workers frequently turn to off-the-shelf roofing cement, thick asphaltic mastic, or retail caulk. While these temporary compounds have a specific, limited role in emergency flashing repairs, using them as a permanent substitute for proper carpentry and sheet metal integration is a major blunder.
Roofing cements and generic caulks are highly vulnerable to Southern California’s harsh environmental conditions. Under relentless solar ultraviolet (UV) radiation and intense day-to-night thermal cycling, quick sealants dry out, shrink, peel, and crack rapidly.
Furthermore, applying heavy layers of mastic over damp or dirty roofing materials creates a seal that traps moisture directly against the structural decking and metal fasteners. On steep-slope roofs, trapped water spreads sideways beneath shingles until it finds an open nail hole. On flat or low-slope roofs, a thick, raised patch of mastic acts as a miniature dam, holding standing water against membrane seams and forcing it into the building framing.
Finally, many retail sealants contain aggressive chemical solvents that react negatively with modern roofing membranes.
Applying asphalt-based mastic over single-ply TPO, PVC, or specialized synthetic underlayments can dissolve or blister the membrane, permanently destroying the material and voiding the manufacturer’s warranty.
Mistake #3: Repairing Surface Shingles or Roof Tiles While Ignoring the Subsystem
Another major error occurs when surface materials, such as asphalt shingles or concrete tiles, are repaired or replaced without evaluating the underlying waterproof layers.
In asphalt shingle systems, the visible shingle is only the first line of defense; the true watertight barrier relies on continuous underlayment, proper fastener placement, starter courses, and metal flashings. If a storm dislodges a shingle and tears the underlying felt paper, simply nailing a new shingle over the torn underlayment leaves the home vulnerable. Water can still slip beneath the shingle lap, travel along the tear in the underlayment, and penetrate the plywood deck.
Fastener errors during roof shingle repairs also introduce fresh entry points. Overdriven nails that cut through the shingle matrix, high nails placed outside the reinforced nailing zone, or exposed, unsealed nail heads allow wind-driven rain to bypass the shingle field entirely.
On tile roofs, the distinction between surface shedding and underlayment waterproofing is even more pronounced. Clay and concrete tiles shed most rainwater, but the underlayment beneath them does the real work of keeping the building dry. Over 20 to 30 years of intense attic heat, underlayment felt paper becomes brittle, cracks around nail shanks, and degrades. Replacing a single broken surface tile does nothing to fix the paper-thin, cracked underlayment beneath it. Furthermore, if tiles are removed and reset without preserving their original interlocking pattern and drainage channels, rainwater can be redirected sideways beneath adjacent tiles, creating a brand-new leak.
Mistake #4: Overlooking Flashing Geometry and Transition Details
Statistically, most roof leaks do not begin in the middle of an open field of shingles or tiles; they originate at transitions, penetrations, and perimeter edges. Flashing, the custom-formed sheet metal installed around chimneys, skylights, plumbing vent pipes, roof-to-wall intersections, and valleys, is designed to protect these high-volume water zones.
Because metal flashing reacts differently to temperature changes than wood, stucco, or asphalt, flashing joints move continuously. A common mistake is smearing caulk along the top edge of a loose flashing panel instead of replacing the degraded metal or re-engaging the counter-flashing.
Caulk degrades rapidly under sunlight and thermal movement. When it fails, water flows behind the flashing and directly into the wall framing. Even worse is sealing the lower edge of step flashing where water is supposed to exit onto the roof field. Sealing the exit point traps water behind the metal, forcing it backward into the building’s interior structure.
Mistake #5: Neglecting Drainage, Slope, and Ponding Water
A repair that focuses strictly on patching a hole while ignoring overall drainage dynamics is doomed to fail. This is particularly true on low-slope and flat commercial or residential roofs.
When a roof develops low spots due to structural settling or compressed insulation, rainwater accumulates into standing pools. In the roofing industry, water that remains on a low-slope roof surface for more than 48 hours after a rain event is classified as ponding water.
Applying a surface patch over a leak in a ponding area without addressing the lack of drainage creates a raised edge that holds back even more water. Standing water exerts continuous hydraulic pressure on the edges of the new patch, softening adhesives, re-emulsifying water-based coatings, and breaking down seam bonds until water finds its way into the building once again. Long-term performance requires improving drainage patterns and slope, such as installing tapered insulation crickets or clearing blocked drain bowls, rather than simply spreading more material over a submerged crack.
Mistake #6: Leaving Interior Moisture and Saturated Sheathing Behind
The final, critical error in many fast-fix repairs occurs after the roof surface has been patched: declaring the job finished while ignoring the wet structure beneath.
When a roof leaks over an extended period, water saturates the underlying plywood decking, structural rafters, and attic insulation. If a contractor patches the roof exterior but leaves saturated insulation and wet plywood sealed inside the roof cavity, severe consequences follow:
- Structural Sheathing Rot: Wet plywood loses its structural density and holding power. Fasteners holding the new surface patch can pull free from soft, rotted wood, causing the repair to fail during the next windstorm.
- Mold and Indoor Air Quality Hazards: Damp attic insulation trapped in a warm, unventilated space becomes an ideal breeding ground for toxic mold within 24 to 48 hours. Mold spores can circulate through interior HVAC systems, presenting serious health risks to occupants.
- Thermal Efficiency Loss: Saturated fiberglass or cellulose insulation loses its thermal R-value, forcing HVAC systems to work harder and driving up monthly utility bills.
A thorough repair must evaluate the condition of internal materials, replacing saturated sheathing and wet insulation to ensure the structural foundation beneath the new roof materials is completely dry and sound.
The Diagnostic Solution: Root Cause Analysis and Comprehensive Care
Avoiding these costly repair mistakes requires a fundamental shift in perspective: moving away from quick, surface-level patches and embracing a systematic, diagnostic approach to roof care. A proper repair doesn’t just cover the spot where water dripped; it investigates how water entered, how it traveled across structural layers, and what’s needed to restore the entire water-shedding system.
Partnering with an experienced, local contractor like Greatway Roofing ensures that your property receives the rigorous, diagnostic attention it deserves. Serving thousands of residential and commercial property owners across Ventura County, the West San Fernando Valley, and the Santa Clarita Valley for over 25 years, they understand the unique climate demands and architectural nuances of Southern California buildings.
Operating under a strict six-point pledge- Diligence, Accountability, Professionalism, Respect, Integrity, and Clarity- Greatway Roofing approaches every leak with total transparency. Rather than offering temporary Band-Aids or pushing unnecessary full replacements, their certified estimators conduct thorough “inside-out” evaluations. They inspect attic spaces, evaluate ventilation patterns, examine structural sheathing, trace water pathways, and verify that repair materials are 100% chemically compatible with your existing roof system.
Supported by manufacturer-certified craftsmen, real-time photo and video updates, meticulous daily cleanups, and a Limited Lifetime Workmanship Warranty on complete reroofs, Greatway Roofing gives property owners complete peace of mind. By addressing the root cause of roof issues the first time, you protect your building’s structural integrity, preserve interior finishes, and save thousands of dollars over your property’s lifespan.
Frequently Asked Questions
Why does my roof continue to leak in a different spot after a patch was applied?
A roof leak rarely travels in a straight line. When a patch is applied over the indoor stain location rather than the true exterior entry point, the original breach remains open. Rainwater continues entering the building, traveling along rafters or underlayment laps until it drips through a new opening in your ceiling drywall.
Is roofing cement a permanent fix for a roof leak?
No. Roofing cement and retail caulks dry out, shrink, and crack under solar UV radiation and temperature fluctuations. They are designed for temporary emergency containment, not permanent waterproofing. Long-term repairs require proper sheet metal integration, heat-welded seams, or replacement of compatible underlayment.
Can a roof leak cause structural damage before it shows up on my ceiling?
Yes. Rainwater can enter a roof breach and become absorbed by attic insulation or wooden decking over several months before enough moisture accumulates to penetrate your interior drywall. By the time a ceiling stain appears, hidden dry rot or mold may already be present in your attic framing.
How do I know if my roof repair requires fixing the underlayment?
If your roof features clay or concrete tiles or architectural shingles, the surface material sheds most of the water, while the underlayment serves as the primary waterproof barrier. If water is penetrating your home despite intact surface tiles, the underlying felt paper has likely dried out, cracked, or torn, requiring targeted underlayment replacement.
What is included in a professional diagnostic roof inspection?
A comprehensive diagnostic inspection goes beyond looking at surface shingles. A qualified contractor evaluates flashing details at wall transitions and chimneys, inspects pipe boot seals, checks attic ventilation and moisture levels, examines structural decking for soft spots, verifies proper roof drainage, and uses photo or video documentation to show you the exact root cause of the leak.
Roofing Conclusion: Protecting Your Property for the Long Term
A roof is the most important protective barrier safeguarding your family, property, and financial investment. While opting for a quick, low-cost surface patch when faced with a sudden leak is understandable, fixing only the visible drip while ignoring system-wide failure is a dangerous financial gamble.
By choosing a diagnostic approach that identifies the true entry point, addresses flashing and drainage transitions, respects underlayment integrity, and restores structural sheathing, you protect your building from compounding wood rot, mold hazards, and premature system failure.
Invest in quality diagnostic care, insist on transparent explanations, and partner with trusted local professionals who stand behind their work. Addressing the real problem today ensures that your roof remains a secure, durable, and reliable shield for decades to come.